Thursday, November 16, 2017

Technology Spotlight: Kahoot

I'm so excited to be leading a guiding coalition on educational technology. I will be working with the same group of educators each month and introducing different tools they can use in their classrooms. This month I focused on assessment. I introduced Edulastic for my intermediate teachers and Kahoot for my primary teachers.

Since I've already done a post about Edulastic, I'd thought I would focus this post on Kahoot.
You can see my step by step guide below for Kahoot that walks you through how to create an account, creating quizzes, and viewing reports.

When using Kahoot, one thing to keep in mind is that you must wait for all users to enter the game room before you begin a game. Another thing to consider when choosing Kahoot as a tool is the fact that the answer choices that your students choose from are projected on the screen and the students only have the color choices on their screen. This may be good for primary students who need a simpler format when using a Web tool like this. The students are all answering the same question at the same time, so when they have answered a question they must wait for the others to answer before moving on. Again this may be good for primary grade levels where the teacher wants more control, but your intermediate students may get bored while waiting. Intermediate students may benefit from Kahoot if given a chance to create their own Kahoot for the class since the platform for creating quizzes is very easy to use.

Another modification for primary students, especially when first using Kahoot, have students complete the assessment as a small group or with a partner, ie. one device per 2-4 students.


Image result for kahoot logo

Check back soon for my post on Quizizz so you can see which one you like best!

Tuesday, November 14, 2017

Guided Reading Tracker Using Google Forms

One thing that I have never been good at is keeping notes for my guided reading groups. I meet with my groups on a daily basis, but I just never found a way that works for me when it comes to taking notes. One year I even set up this beautiful binder full of note-taking pages and struggled to use it.

Enter this year, I decided there had to be a way I could quickly use my Chromebook to jot down information. I use my Chromebook for my lesson plans so it is sitting right there open on my table, so what could I use... Google Forms!

While I am not super excited about the spreadsheet for my responses (I need to play around with some of the add-ons), I am being very consistent on taking quick notes about who was present in the group that day, what text we read, any activities the students did, and any notes about the students.

Below is a step-by-step guide to setting up a Google Form to be used as a note taker for groups.


Enjoy!

Saturday, October 7, 2017

Vocabulary/Word Wall Cards Done Easy

It has been a while! Even though this is my 8th year of teaching, I always forget how the first month of school is always a crazy whirlwind where I feel like I am trying to catch up!

Now that things have settled down it is time to get back into action on this blog!

First up, a super quick and easy way to make vocabulary word cards for a word wall, focus board, or flash cards for the students using Google Slides


To make these word cards:

  • Create a new Google Slides document
  • Decide if you want the cards to be widescreen (16:9) or standard (4:3). To do this, click on File --> Page Setup --> Choose a size.
  • Choose the slide layout that has a title at the top and nothing else on the slide.
  • Type your vocabulary word in the "title" section. On the first slide, format your font size and style that you want for all of your slides so that it will be easy to keep them all the same.
  • Click on Insert --> Image --> Search. This will allow you to do a Google search for an image you want and the nice thing is the images that are returned are all labeled for reuse with modification!
  • Click on the image you want to insert and then click on Select.
  • Once you are ready to create the next vocabulary word, right click and choose Duplicate Slide or click on Slide on the menu bar and Duplicate Slide. This keeps your formatting the same for each slide. Just delete the picture and search for a new one.

I prefer to print the cards with four slides on a page as seen above so that they fit nicely on my word wall.

When printing the cards:
  • Click on File --> Print settings and preview.
  • Where it says 1 slide without notes, you can click to see your other options. I usually choose Handout - 4 slides per page. I also use Landscape.
  • Once you have chosen the size that works for you, click on Print or Download as PDF if you want to save for later.

Tuesday, September 12, 2017

Words Their Way - Getting Started

It's the beginning of the year which means craziness in the Potter classroom with beginning of the year assessments, getting everything and everyone organized, and our county decided to also throw in an overnight field trip in the second week of school! (seriously, the second week??)

However, in all of this craziness I made myself get my Words Their Way pretest given so that I can get my word study up and running as soon as possible.

For those that don't know what Words Their Way is, it is a word study program that allows you to differentiate the words that your students study based off of a pre-assessment.

Image result for words their way

The above picture is the overview of the word study program. You can also find out more information at Pearson Website.

I have used this program for the past four years and honestly every year I learn something new or try something new. I say this so that if you have tried it and failed, or if you are interested in trying it, just know that it can be confusing or overwhelming at first, but stick with it and figure out how to adapt it for your classroom and your teaching style.

To get this program up and running in your classroom, you will need to give your students the pre-assessment. There are three levels of this depending on what grade level you teach. There is a primary version, an elementary version, and an upper elementary version. Even though I teach fifth grade, I typically start off with the elementary version, partly because our school has a high number of ELL learners and quite often they struggle with spelling, so the upper elementary version may be too hard and not give me accurate data.

After students are given the pre-assessment, then the teacher will score the assessment using something called the Feature Guide. The feature guide breaks down each of the words into different parts. When using the feature guide, we aren't focusing on whether the word is correct or not, but rather if they got a specific part of the word correct. Sometimes words will be used for beginning and ending consonants, vowel patterns within the word, word endings, suffixes, etc. The feature guide is broken up into 11 different sections for the elementary list. After determining what word parts the student got correct, you will total up the amount of word parts correct in each of the 11 sections. The place where the student first misses TWO word parts is the place where they should begin their word study.


After you have completed a feature guide for each student, it's now time to form your groups! When I first started out, I had a group for each section that a student fell under. However, I went to a conference and actually got to attend a session with Donald Bear and he said to stop making ourselves crazy with all of these groups. He recommended no more than THREE groups in a single class. This means that there are often kids who are not starting where they should. So his next suggestion, it is always better for a student to take a step or two backwards in order to fit into a group, rather than have a bunch of groups.


As you can see in the picture above, I do have a few outliers and I just had to use my best judgment to put them in the group that I felt they would most benefit.

Over the next few weeks I will create posts to show how I use Words Their Way in my classroom and share the resources that I have found or created.

Thursday, August 24, 2017

Classroom Library

Since having a baby in the middle of June and using my summer break as my maternity leave, I have not been as eager to jump back into my classroom to set things up. However, I had to attend the leadership retreat Tuesday and Wednesday this week so I sent the kids off to daycare (cue the crying) and dragged myself to work. Honestly, since it was baby #2 it wasn't as bad as I thought and once I walked in the front door of school I knew I was ready.

I got a little bit of time to go into my room yesterday and set up my classroom library.  Last year I was in a new (and AMAZING) room that actually has built in shelving. I didn't realize how amazing this built in shelving was until the end of last year when I was told, don't take anything off the shelf, just cover it up! You don't have to tell me that twice. Flash forward 10 weeks... and for the first time ever in my 8 years of teaching, I set my classroom library up in 10 minutes! Take down the paper, put up the bins and books for the top of the shelf and voila! It's done!


Last year I decided to use a chalkboard theme, which means I made new labels for my book bins. I also went with the emoji theme as well. Click on the picture below to get my book labels for FREE!


Stay tuned for my classroom reveal!


Technology Spotlight: Adobe Spark Video

Image result for adobe spark video

Adobe Spark Video

A few weeks ago I did a spotlight on Adobe Spark Page where students (and adults) can easily create a web story with images, words, etc.

This week the focus is on Adobe Spark Video, which I found to be a great tool for younger students or students who struggle with writing. My students were able to choose this web tool as a way to publish their final drafts of their biographies. In my fifth grade class this past year I had a few students who struggled with writing, so their biographies may not have been as well developed as I would have hoped. However, when they realized that they could use the video option to publish their final drafts and could actually speak rather than type or write they did awesome!  A few of them even added additional information that they hadn't written down, but remembered from doing their research!

Once I learned about this tool in January, I had our technology person add the app to the iPads for the school right away. This tool is so quick and easy to use that I started encouraging all of the teachers to include it as a choice, from Kindergarten through 5th grade.

When the students use the app or web version, they build their video one slide at a time, almost like a presentation. They can add images, text, and their voices to the slide. Then once they are finished editing they can preview their video and even add music if they want.

*side note - unfortunately I do not have permission to share the two student's work that chose Adobe Spark Video this past year in my class, but I plan on incorporating this as a choice a lot more this year so stay tuned for some student examples!

Monday, August 14, 2017

Google Infused Classroom

Image result for google infused classroom

If you teach in a school that has access to Google Apps then this book is a must-have!!  This book is all about infusion, which means how you can use two or more of the tools together at one time.

I absolutely love the way this book is organized. It is a resource rather than a read from cover to cover, which is awesome. The beginning of the book is all about pedagogy and the hows and whys of educational technology. The middle to end of the book is all of the tools that can be used in the classroom. Each tool is broken down into what it is, why its great, how easy it is to use, what the students do with the tool, and how they share the information. The tools are broken into different categories: assessment tools, tools for differentiation, tools for demonstrating learning, tools for reflecting, and a section on digital portfolios.

I was planning to try out portfolios with my students this year and after reading this book we will be setting them up the first week of school using Google Sites.

Tuesday, August 8, 2017

Technology Spotlight: Google Drive Offline

So last week's post is almost a week late, which is why I am focusing on Google Drive offline.  We changed TV providers two weeks ago so we also changed internet providers. However, I wasn't thinking and canceled our internet before I had our new internet set up. Of course I still had work to do for my admin courses so being able to work in Google Drive offline was a life saver. I would just use my hotspot on my phone for me to upload my assignments.

The Google Drive applications that you can access offline are Docs, Sheets, Slides, and Drawings. To access them when you do not have internet access you will need to download the Google Chrome extension. (you will need to download this extension while you have internet access) To open your files log into Google Chrome, then go to Google Drive and open Settings. (settings can be found by clicking on the gear icon near the top right of the screen. Once in your settings, make sure the box is checked where it says Offline "Sync Google Docs, Sheets, Slides, & Drawings files to this computer so that you can edit offline". To begin editing, find your doc and start working!

If you are on a PC or Mac you can also edit your Google Docs, Sheets, Slides, and Drawings by downloading the Backup and Sync app. For more information click here.

I definitely made sure this extension was on each of my students' Google accounts this past year for those few times when we lost power so the kids could keep right on working on their chromebooks and not worry about losing their work.

Saturday, July 29, 2017

Technology Spotlight: Adobe Spark Page

Image result for adobe spark page icon


This past week has been hectic. Completing classwork for my two admin courses and trying to get the house ready for my father who was coming to town means that I am two days late on my Technology "Thursday".

This week I would like to talk about Adobe Spark Page. I was introduced to this web tool last January at an I Teach Digital Workshop and immediately went back to my classroom and used it with my students. It is a free visual and digital storytelling tool. I had this as one option for my students to publish their biographies.

There are two ways to have students use it. If your students have a Google account then they can sign up with their own accounts using the one click sign-in. If your students do not have a Google account you can sign in with a generic class Google account that all of the students have access to. If you go this route, make sure you have a discussion with your students about only editing their own personal work and not touching other students hard work.

Here is an example of my personal page that I use as a resume: Amber Potter example

Here are some examples from my 5th graders: Biography Final Drafts
**there are some examples using Adobe Spark Video which I will talk about next week
**the link will take you to a Padlet, which I will also talk about another week

Adobe Spark Page was very easy for my students to use. In fact, I only showed them briefly how to log on and a few little editing tips and then let them figure it out on their own. I was pretty impressed with their final products especially considering I just let them explore the web tool on their own and even I was still in the learning phase.  There is an app for Adobe Spark Page for tablets and phones, but my students who tried to use it on the iPad struggled with the editing part. We did however, use the iPads to view the finished products in a carousel around the room.

My favorite thing about Adobe Spark Page is the ease of use. There are text boxes already created for your title and subtitle. There is a button for you to click if you want to add a photo behind your title. Next, as you move down the page you will see a little plus sign. Simply click the plus sign and it will give you the options of what you can add next.

The best way to learn is exactly what I did with my students... explore! Play around with adding each of the different options and enjoy!

Monday, July 24, 2017

Admin 1 Certification...here I come!

A little back story for you... Growing up I enjoyed pretending to be a teacher, completing a mentor-ship in high school in a classroom, and worked at a daycare. I knew inside I wanted to be a teacher and so did everyone else. EVERYONE said I would make a great teacher one day. Then I went off to college and my rebellious side kicked in. If everyone wanted me to be a teacher, then I no longer wanted to be a teacher. I changed my major to Marketing and now have a bachelor's degree that I don't use. I took a year off and guess what, went back for my Master's in Education.

Flash forward to the present. I just finished my 7th year of teaching. In my previous school in Virginia, my principal told me multiple times that I should go for my admin certification because I was a good leader. She took me to a principal conference with her, had my team perform our collaborative planning meeting in a fishbowl for other principals in our area, and had me participate in Adaptive Schools training. At my current school again I have been told that I would be a good candidate for a leadership position. So guess what... I am now enrolled in Admin 1 courses and should be finished with my certification next year.

Maybe it is just my stubbornness coming out. Maybe I needed to decide on my own that I really wanted to be a teacher and now in an administration position. Maybe I needed to grow up/mature and truly prove to myself that I am ready for the next step. I will say that since I have decided I want to pursue this next accomplishment, I have put on another cap when it comes to teaching. I have already been thinking about ways to better my instruction this year, as well as, come up with a few ideas that would help other teachers in my school as well.

I can't wait to begin this next journey (because I truly believe life is a bunch of small journeys all pieced together, hence the title of the blog) and I can't wait to share it with you all. Special shout-out to Mrs. Daniel who has truly been my inspiration, motivator, and role model with this decision!

Sunday, July 23, 2017

Peer Coaching Part 2

After finishing the Peer Coaching book (see previous post), it really had me thinking about how I could take that back to my school.  The past two years I have tried to run some sort of professional development around technology in my school and personally I feel that it was only somewhat successful. I think I feel this way because I was trying to reach the whole school, but was only getting through to about 8-10 people.  I wasn't looking at this 8-10 people as successful in the grand scheme of things.

This book made me realize though that I don't need to hit the entire school. I need to start small and only reach a handful of people and actually focus on helping them throughout the entire year.  When it comes to professional development this book mentions that in order for professional development to be effective, "teachers need about 50 hours of professional development to improve in a specific area." (p. 26) However, as teachers we often attend 1-2 day training on a topic and then are expected to soak everything in, turn around and use it in our classrooms. That is what I was expecting from the professional development I was giving.

So here is my plan for this year...
At the beginning of the year I will explain to the staff that I would like to hold professional development around integrating technology again, however, I want them to have a say in what PD they would like. I will ask for those teachers who would like help to fill out a Google Form. This form will not only ask for what specifically they would like help with, but will also get their planning times and whether they would be willing to meet after school. I am hoping to get about 5 people who truly want help integrating technology on a long-term (ie. full school year) basis. The idea would be that we can meet before or after school to look at lesson plans and determine where they can integrate technology into their lessons. Ideally, I would then like to go into their classroom during my planning time to observe or help with the lesson so that I can provide feedback. I would also invite them into my classroom during their planning time so that the teachers can observe my students using technology as well.

This past year we had a technology team with 3 other people. I would love to get them involved as well, seeing as that we all have different areas of strength when it comes to technology. If they are interested as well, then we can each take on the task of "coaching" other teachers and be able to reach more people if the interest is there or they can offer additional assistance to the people that I am already helping out as mentioned above.

Ultimately, if I can get 5 more people at our school extremely comfortable with integrating technology in their own classrooms, then hopefully in future years they can then turn around and help coach others in the school so that eventually everyone in our school is comfortable integrating technology!

Stay tuned this fall and we will see how this goes if my principal is ok with the idea!

Saturday, July 22, 2017

Book Review: Peer Coaching

Image result for peer coaching unlocking the power of collaboration 

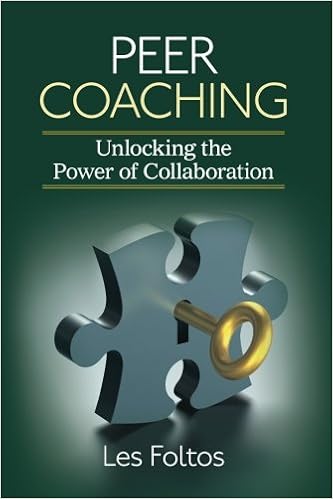
This year I was the Title 1 Technology Facilitator for my school and at the end of the year I was given this book for some summer reading. Honestly, I looked at and immediately thought, how does this pertain to me? I'm a classroom teacher. We don't have coaches at my school. I doubt this is in the budget. So why? But I decided to give it a go and I am so glad that I did!

The book walks the reader through an introduction of what a coach is, why we should have coaches, and then takes you through the preparation necessary to become a coach and the roles of a coach. While I don't see peer coaching in my near future, I was able to take many ideas from this book into my every day teaching and possibly bring some ideas back to my principal.

One of the first take-aways from this book is that there should be collaboration between teachers, and in order to have this collaboration teachers must have respectful and trustworthy relationships. Another important aspect of collaboration is communication. In order for teachers to collaborate, they must have strong communication skills that include active listening, paraphrasing, and questioning.

My second take-away is around feedback. When collaborating with a teacher (whether in a coaching role or not), we have to begin moving away from "nice conversation" and focusing on the teacher. Instead, we need to focus on the students and how engaged they are in a lesson, as well as, ask probing questions that will allow reflection on teaching practice and lessons.

Another take-away is that a learning activity can have four characteristics. It can be a standards-based task, engaging task, problem-based task, or technology enhanced task. An effective learning activity should have some characteristics from each of the four characteristics. The tasks that we are asking students to do should include real-world problems and develop 21st century skills. These real-world problems need to have meaning to the students and draw on their current knowledge, skills, beliefs, and passions.

Once a learning task has been created (more specifically, once you have identified what it is that you want the students to know and be able to do), you need to include standards. There are three types of standards. First, curriculum standards. Then each learning task should have a 21st century standard, as well as, a technology standard.

An effective learning task should have directions that offer the students a "road map to solve the task their teacher outlined" (p. 126). It should also give students choices in what and how they learn. This task should also have assessments. There should be an end-of-activity lesson, but should also have formative assessments throughout the task that give the students opportunities to receive feedback.

The last take-away for me focuses on integrating technology. This quote sums up many teachers thoughts perfectly, "When it comes to integrating technology into classroom learning, part of the teachers' dilemma is deciding what technology to include." Another problem is that new technology is created so quickly that teachers don't feel like they can keep up. This is where collaboration with teachers comes in handy. If there is a type of technology that a teacher would like to use, but is not comfortable using, there may be a teacher in the school that is comfortable that would be able to help that teacher. Another possible solution is letting the students have choice when it comes to choosing technology. Let's be honest, most of them know more about technology that we do! I love to use technology in my lessons and I guess I have never really thought about it this way, but I really liked how this book says that technology supports a learning task. We should never think about technology first, but rather come up with a learning task, connect it to standards, and then determine where technology can be added to the task. "Technology is not transforming learning; it is just a tool the students in these activities used to reach the goals of the learning activities." (p. 145)

If you are someone who is interested in becoming a Peer Coach or starting a Peer Coaching program at your school, this book is a good place to start!  If you are not interested in Peer Coaching, but would like to learn more about collaboration and how to create effective learning tasks then this book is for you as well.

Thursday, July 20, 2017

Technology Spotlight: Google Drawing

Today I spent the day at my mother-in-law's house. We got home, had dinner and of course both kids wanted me to put them to bed. So as I sit here tired, I really thought about just pushing this blog post to tomorrow, but it's my 6th post and I had to hold myself accountable. So here goes!

This week's technology spotlight will be on Google Drawings!

I work in a Google for Education county, which means that I have learned a lot about different Google apps. I have attended and presented at EdTech Summits, I completed the Google Certified Educator Level 2 training, and I have taught in a 1:1 chromebook classroom. With all of that being said, one of my favorite apps to use with students in Google Drawings.

This app is so versatile and easy to use. When you open a new drawing, you are opening a blank canvas that you (and more importantly your students) can transform into anything!

Below you will find a presentation about the basics of Google Drawing (click the image):

Here are a few ways that I have used Google Drawing in the classroom:

Graphic Organizer (students can type in it)
Day 4 Graphic Organizer.jpg
Student-created brochure 
Inside of Brochure - Halima Tiamiyu.jpg

Student-created timeline
Transportation Timeline - student example.jpg
Drag and Drop Questions
 TECR.jpg

Mind Maps
Character Sketch.jpg    
Anchor Charts
Accountable Talk.jpg

Interactive Text
Syntax Surgery.jpg

A few other ideas:
  • awards
  • binder covers
  • flyers/postcards
  • invitations
  • social media/website banners
  • labels
  • games

If you have other ways that you have used Google Drawing, leave a comment below!

Tuesday, July 18, 2017

Notice and Note Resources

After getting some inspiration from the Notice and Note books, Google, and Pinterest, I came up with the anchor charts that I plan to use in my classroom and figured I would share them! Enjoy!

Click on the image above to get the Fiction anchor charts.

Click on the image above to get the Nonfiction anchor charts.
Fiction Bookmarks 
Nonfiction Bookmarks


Monday, July 17, 2017

Book Review: Reading Nonfiction: Notice & Note Stances, Signposts, & Strategies

Image result for nonfiction notice and note

Fiction invites us into the imaginary world the author has created; nonfiction intrudes into our world, and purports to tell us something about it.”

After reading the first Notice and Note book by Kylene Beers and Bob Probst, I knew I had to read the nonfiction book. Just like with the first book, I got through this one in about 3-4 days. The authors have a way of writing that makes it easy to get through and makes you not want to put the book down.

The first section of this book is all about defining nonfiction (they really make you think twice about your own definition of nonfiction, what you were taught as a kid, and what you may/may not teach your kids now). Once they have defined nonfiction for all stages of learning, they again discuss rigor and complexity just like they did with fiction texts. The thing that stuck with me the most with rigor and complexity in the first book, was again mentioned in this book... reading a difficult text is not rigor, how a student is engaged with a text increases rigor.

Since this book is focusing on nonfiction, Beers and Probst include a section about disciplinary literacy. They do a great job of including how these strategies, signposts, etc. can be used across all content areas (math, science, social studies).  For someone like myself that teaches all subjects, I loved this because it will allow the students to see that they can use these strategies, etc. in all areas, not just reading class.

The next section of this book focuses on 3 "Big Questions" that students can be asking themselves as they read any and all nonfiction text.
  • What surprised me? (replaces "what did you learn?")
  • What did the author think I already knew? (students ask this when confused)
  • What challenged, changed, or confirmed what I already knew? (teaches children that it is ok to change your mind)
The next section of the book focuses on the signposts. There are five signposts for nonfiction text.
  • Contrasts and Contradictions
  • Extreme or Absolute Language
  • Numbers and Stats
  • Quoted Words
  • Word Gaps
I love these signposts because they should be easy to spot for the kids when reading nonfiction, but the questions that go along with them help the students to slow down and really think about what the author is saying in the text.

The last section of this book focuses on strategies that the teacher/students can use before, during, and after reading. These strategies are tools that the teachers and students can use to scaffold our thinking process.

As with the first Notice and Note book, I loved this book and can't wait to use it in my classroom. Our unit for quarter 2 is all about nonfiction, so stay tuned come November for examples of ways I am using it in my room!

Thursday, July 13, 2017

Technology Spotlight: Edulastic

Image result for edulastic icon 


I first learned about Edulastic at a workshop I attended back in January. We didn't get a chance to go over it in detail at the workshop, so I looked it up and explored it on my own.  As soon as I began exploring I was like where has this been all of my teaching life?!

Edulastic is a website that allows you to create assessments online. I work for a Google county, so the first thing I liked was that I (and my students) could sign in with Google with one-click. It also connects to Google Classroom so you can easily add a class and then push assignments to Google Classroom.

There is an assessment library where you can search for previously created assessments or create a new assessment with previously created questions. The function I used the most, though, was creating my own assessments and questions.

You can create assessments for any content area and attached standards from Common Core, NGSS, or state-specific standards. Another feature I absolutely love is Collection option. When you create an assessment you can keep it private to only yourself, you can share it on a school level so that other teachers in your school who have an account with Edulastic can see the assessments (we used this a lot on my grade level team), you can share it on a District level if there are other teachers in your district who have signed up, and/or make the assessment Public so that anyone with an Edulastic account can access it.

The assessments I used and tried with my students this year were in Science, Math, and Reading. This program helps prepare students for the PARCC and MISA (our version of the science assessment for NGSS). You can create classic questions types with items like: multiple choice/selection, essay, true/false, or text drop down. There are also math technology enhanced items like: numeric, expressions, fractions, graphs, label an image, multi-part, or drawing. (these would also be great for science) Lastly, there are ELA technology enhanced items like: passage based, editing task, matching, re-sequencing.

The thing that I have been looking for forever it passage based responses that would allow the reading passage to be next to the question similar to how it is designed on the PARCC assessments. Well with this program you can do that! Did I mention that it also grades the assessments for you?? (except for the written responses obviously)

Under the Assignment tab, you can see which students have completed assignments, see the responses that students have submitted, grade the open-ended/written response questions, and then release the grades to the students so that they can see their scores. 

Another feature is the Reports section. This section allows you to see a Mastery Report by standard. This allows you to quickly and easily see what standards the students have mastered and which ones they need to work on.

I am sure there are features that I am missing and/or haven't discovered yet. I am really looking forward to using Edulastic more next year!

Tuesday, July 11, 2017

Book Review: Notice and Note: Strategies for Close Reading

Image result for notice and note book image

I was first introduced to this book three years ago at a conference I attended over the summer. To be completely honest, we did some hands-on activities, I got some digital resources, and I didn't think much else about it. It wasn't that I didn't want to know more about the book and its signposts, it was just bad timing. I was getting ready to begin my first full year of teaching in Maryland (I was hired in January by the county I currently work for after teaching for 3 years in Virginia) and I was changing grades. I was so overwhelmed by these Common Core Standards, this new curriculum I was getting ready to have to teach, and working in a school where I still felt like the new person that taking on another thing when it came to teaching would have pushed me over the edge.

Flash forward three years and now I feel like I am finally at a place where I can try new things. One of my team members used this book this past school year and loved it, so I figured I know a little bit about it, I have someone close to me that has used it in the classroom, let's give this a try.

I decided to read this book first out of my long list of summer break reads. Let me just say that I finished the book in 3 days! And that's on top of being home with a 2-year old and a newborn. (thank goodness for nap time!)

As soon as I began reading, I knew right away that I would be using this resource in my classroom next year. Throughout the entire book I was taking notes, making lesson plans, creating charts for me to reference. I created a new folder in my Google Drive and filled it up with anchor charts and the aforementioned items. I already looked at the texts that we use at the beginning of the year to see if any of them have some of these signposts that are mentioned in the book (they do!). Check back this fall and I will blog about my experience teaching the signposts to my fifth graders.

One of my favorite things about the book was how easy it was to read. It has a great layout. It begins with the research behind the signposts, then explains the signposts, and ends with lessons that you can use or adapt to teach the signposts in your classroom. I especially like the lessons. Even though I teach at the elementary level and many of the lessons were middle school or high school examples, it was nice to be able to see the language that was used to introduce the signposts.

If you teach reading at any level, this is a definite must-read! I have already moved on to the Nonfiction follow-up. Stay tuned for that review...


A few quotes from the book I highlighted:

”Close reading should suggest close attention to the text; close attention to the relevant experience, thought, and memory of the reader; close attention to the responses and interpretations of other readers; and close attention to the interactions among those elements.”

”It was the transaction - the interaction - between the reader and the text that created meaning.”

”The problem isn’t that we ask all students to read the same book. It’s that we expect them to read it in the same way.”

Saturday, July 8, 2017

Introduction and Brain Dump

Hi I'm Amber and I'm a workaholic. I mean, here I am currently on summer break AND technically maternity leave and I've decided to start up a blog.

Now, I tried blogging before about 3 years ago and I just wasn't successful. I would create a new post every week for a month and then go missing for 2 months. The problem was, I didn't have a plan. I was using the blog to try and promote items I made for TPT (and let's be honest, the items weren't all that great compared to what people do now), but it was my first attempt and it was a failure.

Fast forward 3 years later and I now I feel like I have so much more to share with the wonderful world wide web, so I sat down and created a plan for how often I would blog and what types of things I would blog about. No more selflessly trying to sell my items. (Now when I create things I just give them away rather than try and make a measly 75 cents off a document that to be honest anyone could create.)

Let me begin by introducing myself. As mentioned, my name is Amber and I am an elementary school teacher who happens to have a love of all things technology. I grew up in Williamsburg, Virginia. I attended George Mason University and received a Bachelor's in Marketing, absolutely hated the business world and decided to get my Masters in Education. I taught for 3 years in third grade in Fairfax and then moved to Maryland where I have taught both third grade and fifth grade.

So here's the plan:

I am definitely going to be blogging once a week on Thursdays. I am going to have a "Technology Thursday" where I focus on different types of educational technology and how I use them in my classroom.

My goal is to also post one other day throughout the week to showcase something about my classroom. Some ideas I have already are things like classroom set up, Daily 5, math rotations, Words Their Way, small group instruction, STEM challenges, and the list can go on (but let's be honest, I needed to get these ideas out now so that I don't forget them come this fall).

In the meantime, I am going to enjoy some time with my new baby boy all while trying to keep my terrible two-year old entertained on these 90 degree days where I don't even want to leave the house!


Stay tuned...